Friday, April 29

Friday's 10 Happy Things...

HAPPY FRIDAY!!!  I hope your week was filled with some unforgettable HAPPY THINGS... and you'll join in with your 10 everyday happy list... plus the creative happy thing you made this week... it can be anything...  a scrapbook layout... a card... something you've baked... sewed... or painted... anything you've created that made you happy...

You have all week to share the link to your happy list & creation... by using the Linky below... that goes directly to your post... it’s super easy & fun to boot!

Here's my 10 happy things for this week...
    1. Easter... New life in Christ. 
    2. Easter Sunday Service, with my family.
    3. An Easter egg hunt. 
    4. Candy eggs... bunnies... & chicks... 
    5. Egg salad sandwiches.
    6. Family movie night... watching Tron.
    7. Super hero t-shirt day.
    8. Skype phone calls.
    9. Summer clothes coming out. 
    10. Getting up super early to watch the Royal Wedding.
And my favorite creation this week is the card I made for the craft fair on Saturday... It reminds me of Spring....

That's it for me on this very... Happy Friday! You can join in ANY TIME with your list of 10 happy things... it's all about sharing the things in your life that make you happy... which are sure to make us happy too!! Enjoy your weekend, see you Monday!!


Thursday, April 28

Happy Little Birdhouse...

Really quick... here's another card for the crafts show on Saturday.... I am now down to scraps of this Kraft Bird Paper by Jillibean Soup. I know they make it in other colors... but it's just not the same as the Kraft paper.... I've been savoring each little piece I use... so it makes me rather sad, that I have only scraps left... I love this paper.

Enjoy your Thursday!!!

Wednesday, April 27

White Paper... A Blue Flower... & A Bird...

Here's a sweet little card I made for the craft fair I'm doing on Saturday... I'm a busy little bee trying to get as many things as I can done!!!!

This card is made with some scrap laser cut paper... I really wanted to the flower and the bird to stand out so I just went with white-on-white. I'm having so much fun with the spring die-cuts by K&Co... sooooo pretty.... and of course, I had to add some butterflies... a spring card just isn't complete without some butterflies... don't your think???

Well, here's to the week nearly over... hope yours is going wonderfully! See you tomorrow!

Tuesday, April 26

Sweet Times Together...

Hello! Happy Tuesday. I hope your week is off to a good start. Here is another layout I made using the fabulous collection from IOD at Creative Imaginations. Whenever I look at it... it reminds me of Spring... ahhhhhh Spring!

This photo with Rainee and her best friend is from one of our many trips to HomeDepot for their monthly crafty kids days! They don't care what they make... a car... a memo board... or this cute rain catcher... for them all that matters is their time spent together!

See you back tomorrow, and thanks for stopping by today!!!

Monday, April 25

Easter Fun...

From the moment Rainee woke up Saturday... there was excitement about all things Easter... our weekend was full.... making carrot cake - Cake Pops... coloring eggs... finding Easter Baskets & eggs... singing praises in church... and going to the movies. This was an Easter filled with... blessings... love... forgiveness and laughter.  I hope your holiday was full of wonderful memories too.

Friday, April 22

Friday's 10 Happy Things...

HAPPY FRIDAY!!!  I hope your week was filled with some unforgettable HAPPY THINGS... and you'll join in with your 10 everyday happy list... plus the creative happy thing you made this week... it can be anything...  a scrapbook layout... a card... something you've baked... sewed... or painted... anything you've created that made you happy...

You have all week to share the link to your happy list & creation... by using the Linky below... that goes directly to your post... it’s super easy & fun to boot!

Here's my 10 happy things for this week...
  1. Butterfly release with Rainee.
  2. Winning the SketchyThursdays Sweet Peach Crop Shop sponsored giveaway... and being a SketchyThursdays fave!!!
  3. Railroad museum & Rainee's first train ride.
  4. A water fights with Steve... Rainee & I won!
  5. First Grade Field Trip to the Nature Reserve... seeing frogs, snakes, tarantulas, bugs, a opossum and an owl.
  6. Taco Tuesday.
  7. Bubbles. Bubbles. Bubbles. Enough said.
  8. Coloring Easter Eggs.
  9. Tootsie Roll Pops... How many licks does it take to get to the chewy center??
  10. Hugs. Hugs. Hugs. Hugs... Rainee's are the best!
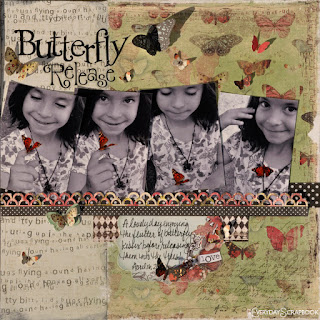
And my favorite creation for this week is my.... "Butterfly Release" layout!  These photos of Rainee with the butterflies... are so fab... I'm so happy I was able to get so many of them on a 2-page layout... because I know I wouldn't have been able to pick just one... thanks for the sketch SketchyThursdays... and the  Sweet Peach Crop Shop kit... and being a ST fave!!!

That's it for me on this very... Happy Friday! You can join in ANY TIME with your list of 10 happy things... it's all about sharing the things in your life that make you happy... which I know are sure to make us happy too!! Enjoy your weekend, see you Monday!!!

A little side note... EverydayScrapbook is sponsoring SketchyThursdays giveaway is week... so come along and play with their latest sketch... and you never know you may be randomly chosen to win a Magnet EverydayFrame!!!

Thursday, April 21

Butterfly cards...

I guess you could say I have a theme going this week... butterflies! Since I still had a bunch of butterfly embellies out for my last layout, I decided to go ahead and make some cards for a local Spring Craft Fair I've signed up for... where I'll have cards, homemade embellies and my EverydayFrames. A few of us moms from Rainee's school are doing it together... so it should be pretty fun!!! I'll have to let you know how it goes!

Anyway... here is the beginnings a card set I'm making... didn't I tell you I had a theme going!

Okay... so before I published this post... I had been checking back and forth with SketchyThursdays posts... so I could let you know EverydayScrapbook will be sponsoring their giveaway this next week... so you'd be sure to play along for a chance to win a Magnet EverydayFrame... And while I was waiting for new sketch and the sponsor post to go up... I found out I was randomly chosen for SketchyThursdays giveaway from Sweet Peach Crop Shop PLUS my layout was picked as a fave for this week! Can you say... happy!!! WOW... I think my Thursday is off to a really fantastic start and it's still early... I wonder what else is in store for my day!!! Thanks SketchyThursdays!!!

Hope your day is one full of surprises... See you tomorrow!!!

Wednesday, April 20

Butterfly Photo Tutorial...

I thought I would do a tutorial on one of the butterfly photos from my layout yesterday... for some this may not be new... for others, it may be something you've wanted to do but didn't know how... so I think it will surprise you how simple this really is to do with your photos.

I will be using Photoshop... on a mac. But most of these simple principles will apply to whatever photo-editing application you may be using...

1. Once your photo is open, make a duplicate of this layer.
2. Rename it to whatever you'd like... I named mine is Black&White copy.
3. Go to Image, then Adjustments, then to Black & White to make this layer Black &White.
4. A window will come up for you to adjust your photo... lighter or darker in black&white... most times I leave this on the default settings... if I do adjust anything it is the reds and magenta... to make the photo lighter or darker... play around with this for making your photo darker of lighter.
5. Enlarge the area you want to have the color on.
6. On your Black&White layer... choose your Eraser Tool. Now adjust your Eraser Tool to size.
For large area choose a large eraser... for small area... choose a small eraser.
I always like to erase large parts first with a large eraser... then adjust the eraser for the detailed areas.
Now erase your image on the Black&White Copy layer.
7. After you've erased the large parts of your image... now adjust your Eraser Tool to a smaller size for the more detailed areas... the edge of the image or like mine the legs and antennas...
now erase the small areas.
8. And you're done!!! Easy right?
9. Now... SAVE this file as a layer document (.psd), just in case you want to go back and make more adjustments. I save mine as the file name + a number, but you can save it as anything you want.
10. Save your file again as a .jpg, this will flatten the layers for you and saving the .psd file.
NOW this saved .jpg file is what you will print....
I hope this has helped you... and you will try using it on some of your photos.
See you tomorrow!!! Enjoy your day!!!

Tuesday, April 19

SketchyThursday & The Butterfly Release...

After enjoying such a wonderful day with Rainee, I couldn't wait to scrap this memory.... and this week's sketch from SketchyThursdays was perfect for these photo!! I loved being able to use so many photos... because I know if I tried I wouldn't have been able to pick only a couple to scrap...

And for the photos... instead of using a color or a black&white for this layout... I did a bit of Photoshop-ing to make the butterfly the emphasis in color and the rest of the photo in black&white. I love love love this effect. I don't use it very often... but when I do... I remember why I love it so much... somehow it makes the photos even more wonderful than they already are....

I have been wanting to use some of my newest stash of papers and die-cuts by Creative Imaginations... their new IOD line with the butterflies is beautiful... is fab!! How perfect is it with these photos?? love love love it! Anyway, thanks again SketchyThursdays for another wonderful sketch... it was perfect for all the photos I wanted to scrap!!! Hope you all have a terrific Tuesday...


Monday, April 18

Butterfly... Butterfly... Butterfly...

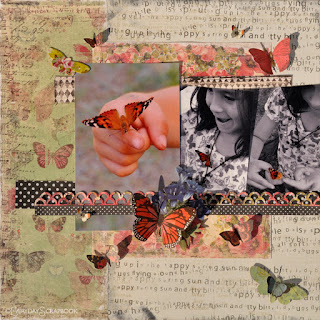
This weekend we had the best time... We went to our regional park, where they had tents full of Painted Lady Butterflies to be released. They had a ton of things for the kids to do... crafts, hay rides, water play... and best of all they were able to go inside the tents to feed and hold the butterflies! Rainee had been waiting for this all week... she was so excited when they landed on her clothes and finger... it was so fun watching her enthusiasm over the whole thing!!! Later in the day as it began to cool off we sat on the ground as they released the tents full of butterflies.... it was beautiful watching them flying off into the trees. Quite a fun spring Saturday thing to do... I'm so happy we were able to go... and it will definitely be on our spring to-do list for next year!!!

Here are a few photos with Rainee and the Painted Lady butterfly....


Friday, April 15

Tissue Paper Blooms... Redo... Photos fixed!!!

Don't know what happened to my Tissue Paper Blooms tutorial post... but here it is again... thanks for letting me know the photos weren't coming through.... soooo let's try this post again shall we...

While I was helping out in my daughters class with tissue paper... I was thinking what a great material to make a flower bloom for card and my scrapbooking. So I came home and started playing around with tissue paper... and here's what I came up with. For this flower I used:

1. 3 different shades of Tissue Paper.

2. Round objects (or templates) for 4 circle sizes.

3. A pencil.

4. A pair of scissors.

5. Glue dots.

6. Flower Centers - I used Pearl stickers


Making 4 different size circles. Trace your circles onto several layers of tissue paper...
Cut out your circles.
 
Use one circle from the 4 different size circles. Layer the circles... change colors for each layer
(I started & ended with the same color). Then place glue dots on the backs of the top 3 layers.
With glue dot tissue paper stacks... put on the center of your bloom.
Crinkle the tissue paper.
Start to open, then smash it up some more... the more crinkles the better.
Open up and fluff up each layer, until it exactly as you want your bloom.
And here's one of my bloom on a card. Enjoy!

Friday's 10 Happy Things...

HAPPY FRIDAY!!!  I hope your week was filled with some unforgettable HAPPY THINGS... and you'll join in with your 10 everyday happy list... plus the creative happy thing you made this week... it can be anything...  a scrapbook layout... a card... something you've baked... sewed... or painted... anything you've created that made you happy...

You have all week to share the link to your happy list & creation... by using the Linky below... that goes directly to your post... it’s super easy & fun to boot!

Here's my happy list for this week... & my favorite creation...
  1. Laying on the grass finding cloud animals.
  2. An unexpected PTA gift from the school staff.
  3. Mash potatoes & gravy.
  4. Walking home from school conversations with Rainee.
  5. Being on SketchyThursdays fav list.
  6. Piggy-back rides.
  7. Finding old photos of my dad.
  8. A coffee date with Rainee... she had chocolate milk.
  9. My favorite sweatshirt.
  10. Wiggly... silly... fun... J-E-L-L-O.
And my favorite creation for this week is this layout.... "the happy day"... I love these photos of Rainee on a Easter egg hunt... I love the bright colors... the fun Bazzil textured paper... the fabulous sketch from SketchyThursdays...

And that's it for me on this very... Happy Friday! You can join in ANY TIME with your list of 10 happy things... it's all about sharing the things in your life that make you happy... which I know are sure to make us happy too!! Enjoy your weekend!!!


Thursday, April 14

Tissue Paper Blooms...

While I was helping out in my daughters class with tissue paper... I was thinking what a great material to make a flower bloom for card and my scrapbooking. So I came home and started playing around with tissue paper... and here's what I came up with. For this flower I used: 
1. 3 different shades of Tissue Paper.
2. Round objects (or templates) for 4 circle sizes.
3. A pencil.
4. A pair of scissors.
5. Glue dots.
6. Flower Centers - I used Pearl stickers
Making 4 different size circles. Trace your circles onto several layers of tissue paper... then cut out your circles.
Using 4 tissues... one from each of the 4 different size circles. Layer the circles... changing colors for each layer (I started & ended with the same color). Then place glue dots on the backs of the top 3 layers.
With glue dot tissue paper stacks... put on the center of your bloom. 

Crinkle the tissue paper. 

Start to open, then smash it up some more... the more crinkles the better.
Open up and fluff up each layer, until it exactly as you want your bloom.

And here's one of my bloom on a card. Enjoy!


Wednesday, April 13

The Happy Day...

Last week I was so busy with the last details for the Magnet EverydayFrame launch... that I didn't get much scrapping done... but this weekend... with the wonderful excuse of the National No Housework Holiday... I was able to do a few things... and this is layout is done with the sketch from SketchyThursdays... which I love love love...

I have been wanting to use this new Bazzil Dot Textured 2-tone core paper I found at Joann's... and this bright pink was perfect for an Easter page... it was so fun distressing it... I can't wait to use the other colors I bought... this was a great find!!! Then as I was putting the photos on... I decided to do something different... so with my Cricut (and my Gypsy) I made these fun Polaroid photo frames for the photos!!! I loved stamping little things about the Easter Egg Hunt on the blank part of the frames... too too fun!!! I love the look of Polaroids... & now that I have these saved on my Gypsy... I know I'll be using them again... and again... love them!

The photos are from the Easter Egg Hunt Rainee went on in Pre-K... 2 years ago... It's so nice to get some more photos scrapped so I feel somewhat caught up... lol... like I'll ever be caught up... ha ha!!! Well, that's it for today... I hope your Wednesday is one full of wonderful things!!!


Tuesday, April 12

And The Giveaways Go To...

Thank you all for your support and for joining in with me in launch of the newest addition to EverydayFrames.... it is so appreciated!!!

And no for the giveaway winners... 
#3 Diana Fisher... will receive the Magnet EverydayFrame
#20 Karen... will receive the Scrapbook goodies!
#8 Jana... will receive the Gift Certificate to one Ella Magazine of her choice....

Congratulations Ladies! Please email me at michelle@everydayscrapbook.com with your contact information. Enjoy! Thank you all again for you support... have a lovely Tuesday!!!